



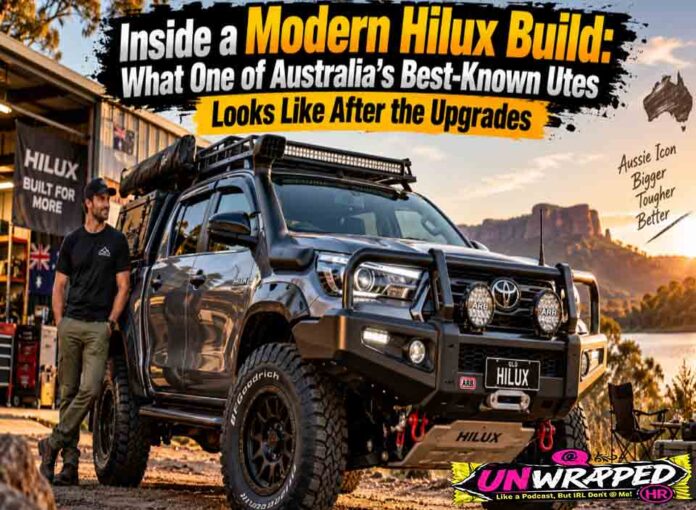
Few vehicles carry as much reputation as the Toyota Hilux. For decades it has been a fixture on farms, mine sites, and school pick-up lines, with a name for shrugging off abuse that other makers still chase. That reputation makes it a favourite starting point for people who want to build something more capable, and the N80-series Hilux, sold in Australia from 2015, has produced some of the most ambitious builds on the road.
Why the Hilux Became the Blank Canvas
A big part of the Hilux’s appeal is its simplicity. The ladder-frame chassis, the proven diesel engine, and a huge supply of aftermarket parts mean that almost any upgrade a builder can imagine has been done before. That track record matters because every modification affects the others, and a builder who can learn from earlier projects avoids a lot of trial and error.
The vehicle’s history is documented in detail on Wikipedia, which traces the model across generations and markets. It shows how the Hilux went from a small, basic workhorse to the sophisticated dual-cab that many Australians now use as a daily driver, a family vehicle, and a weekend tourer all at once.
The Upgrades That Define a Serious Build
A typical build starts with the foundations. Suspension comes first, because it determines how the vehicle carries weight and how it behaves on rough ground. Larger all-terrain tyres follow, along with wheels strong enough to handle the loads. Together, they change the stance of the vehicle and its ability to cross difficult terrain.
From there, the list grows. A front bar and a winch protect the front end and provide a way to recover the vehicle, while rock sliders and underbody plates guard the vulnerable parts. A snorkel, extra lighting, a roof rack, and a canopy turn the vehicle into a self-sufficient tourer. Anyone curious about how all these pieces come together on a completed vehicle can look at a finished n80 hilux build, where the parts list and the reasoning behind each choice are laid out in full.
What stands out in the best builds is restraint. The vehicles that work well tend to be the ones where every part has a job, rather than the ones with the longest accessory list.
Order matters as well. Builders who settle the heavy items first, such as the bar, winch, canopy, and water storage, can then choose springs and shocks matched to the real weight of the vehicle. Those who fit the suspension first and add the weight afterward often end up redoing the work, which is a costly lesson that experienced owners are usually happy to share.
The Trade-Offs Nobody Puts in the Photos
Every upgrade has a cost that goes beyond the price tag. Weight is the biggest. A bar, a winch, a canopy, drawers, and a full load of camping gear can push a vehicle close to its limits, and the more that is added, the less is left for passengers and cargo. Heavier tyres and wheels increase unsprung weight, which can affect ride quality and fuel economy.
Fuel use usually rises as well. Larger tyres, extra weight, and the added drag of a roof rack all take a toll, and owners often find their consumption climbs noticeably after a major build. Handling changes too, particularly on bitumen, where a taller, heavier vehicle feels less planted. None of this means the upgrades are not worthwhile, but it helps to go in with realistic expectations about what is being traded for the extra capability. Maintenance changes too. Extra weight and larger tyres put more load on brakes, bearings, and suspension bushes, so servicing intervals for a built vehicle are often shorter in practice than the schedule in the owner’s manual, particularly for a vehicle that regularly sees corrugated roads or sand.
Building Within the Rules
Compliance is the part that tends to catch people out. In Australia, modifications are governed by a national code of practice for light vehicle construction and modification, often referred to as VSB 14, and by state-based rules that put it into practice. The federal government’s transport portal at infrastructure.gov.au is a useful starting point for understanding how vehicle standards work.
The practical advice is to plan the build around the rules from the start. Lift height, tyre size, weight, and lighting all have limits, and some changes require engineering certification or inspection. Insurers also expect modifications to be declared, and a non-compliant vehicle can lead to a rejected claim. Working with suppliers and fitters who understand the requirements, and keeping paperwork for every change, protects the investment.
A good Hilux build is not about piling on parts. It is about making deliberate choices, accepting the trade-offs, and ending up with a vehicle that does what its owner needs it to do, reliably, for a very long time.