Photography has been one of the most trendy fields for many years. Photos are generally taken to protect some special moments of our lives, be they professional or personal. Billions of pictures are captured every year during events like professional meetups, family gatherings, birthday parties, annual dinners, graduation ceremonies, and more.
The common problem with photo taking is that pictures sometimes get blurry or unclear. In such cases, photographers often search for how to make a blurry picture clear. Are you also looking for dependable ways to enhance blurry photos? You have landed on the perfect guide. It lists two great methods to remove blur from photos. Let’s get a bit deeper into today’s discussion.
Part 1. Why Do Pictures Become Unclear or Blur?
Before getting into the details of fixing blurry pictures, it is more important to understand why photos become unclear or blurred. We have shortlisted and mentioned the common reasons behind this problem below.
1. Missed Focus
When capturing pictures of the scene where subjects are moving, the focus often gets missed. As a result, the captured photos become blurry. It may also happen if your camera has bad autofocus. The advanced technology incorporated into the latest cameras has minimized this problem to a great extent.
2. Motion Blur
When elements move while taking a picture of a specific scene, a motion blur happens. Many photographers do it intentionally, like displaying the movement in traffic or water. It can also be an unintentional activity that happens as a result of too low shutter speed.
3. Camera Shaking
It may happen due to two different reasons. One is when you do not use a high shutter speed while focusing on a scene. Secondly, camera shaking occurs when you do not hold the camera firmly when the photos are being captured. Simply put, when you move while capturing a photo, a camera shake happens. It occurs more often at a too-low shutter speed.
4. Misaligned Focus
Your focus gets misaligned when your lens or camera needs recalibration. As soon as you recalibrate them, you will not face this issue again.
5. Subject is Away from the Camera
This is another potential reason why your photos become unclear. The larger the distance between the object and the camera is, the more blurry the picture will be. Missed focus, camera shake, and air particles also result in the same problem, as stated above.
Part 2. How to Fix Blurry Pictures Online for Free?
Are you searching for how to make a picture less blurry online? Looking for an efficient tool to enhance blurry photos? Your search ends here. Wondershare Repairit – Online Photo Repair will be your dependable picture repair partner. It has an elegant yet simple user interface that makes photo recovery fast and safe. A couple of features that set this software apart are mentioned below.
- The user-friendly navigation assists you to fix blurry pictures with ease.
- When repairing your blur photo, Repairit does not damage its original quality.
- A range of photo formats are supported by this tool, including NEF, JPG, DNG, JPEG, PNG, RAF, and more.
- This tool allows you to upload photos from any storage device, like SD cards, memory cards, Mac computers, Windows operating systems, USB drives, and more.
- It can repair both partially or severely corrupted or damaged pictures.
- A 2048-bit secure connection is used to process your photos when repairing.
A Step-By-Step Guide to Making Pictures Clear with Repairit Online
Carefully read through the steps given below and follow them to fix blurry pictures online for free.
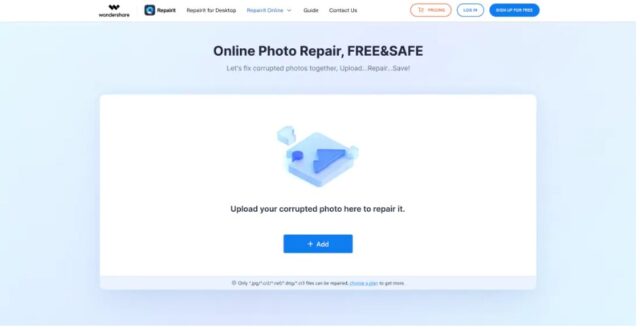
Step 1: Open the website of Repairit – Online Photo Repair.
Step 2: Hit the “+Add” button to upload your blurry photo into this tool. You can also upload the unclear picture by clicking on the text above the blue-colored button, i.e., “Upload your corrupted photo here to repair it.”
If you want to repair more than one photo, you can upload them at the same time. Once done, you will see all of them on the main interface, as shown below.
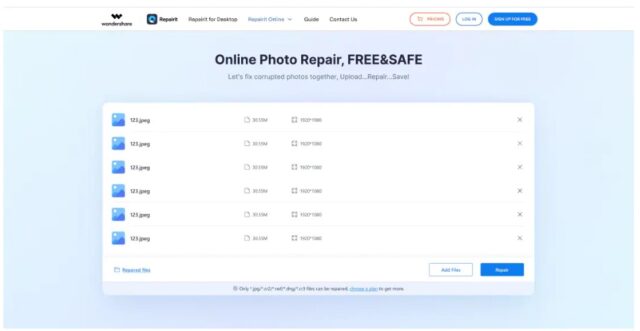
Step 3: Now, click on the “Repair” button to remove blur from photos. The photo repair process will be started automatically, and you will see a message at the bottom of the screen, as shown below.
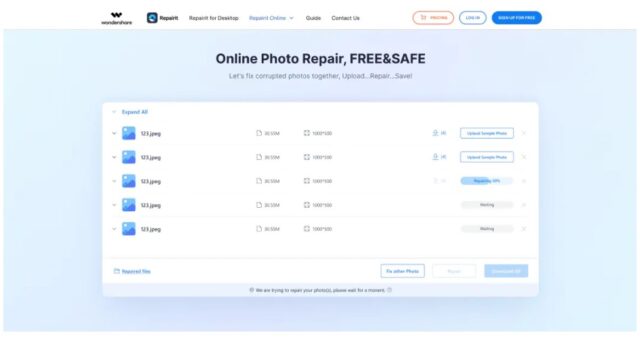
Step 4: Wait until the uploaded photo is repaired. Then, preview it to see if the Repairit Online Photo Repair has done the right job.
Step 5: Now, save the repaired or clear photo if you are happy with the previewed version. You will have to choose a path to save it on your device.
Part 3. How to Fix Blurry Pictures within Minutes Using a 3rd Party Software?
Do you prefer downloading third-party utilities and installing them on your computers to remove blur from photos? If yes, you must try Wondershare Repairit – Photo Repair. It is a great downloadable program introduced to enhance blurry photos. Both free and paid versions of this software are available. The premium plans come with secure file repair, free technical support, and a money-back guarantee.
Features the Add Extra Value to Repairit Photo Repair
The features listed below make this utility more special.
- Attention-grabbing interface and easy navigation make photo repair a convenient job.
- Different photo formats are supported by this software, e.g., SR2, JPG, TIF, PNG, CRW, JPEG, ARW, TIFF, CR2, and more.
- It is compatible with many storage devices, like digital cameras, mobile phones, USB flash drives, hard disks, and more.
- Batch photo repairs make Repairit Photo Repair stand out.
- Advanced photo repair mode for severely damaged photos.
- No limit to the number and size of the repairable photos.
- It supports both Windows and Mac devices.
A Step-By-Step Guide to Fixing Blurry Pictures
You are required to download Wondershare Repairit before moving toward the steps mentioned below.
Step 1: Open Repairit and click on the “Photo Repair” tab from the left panel of the tool.
Step 2: Tap on the “+Add” button or click the text “Add photo(s) and start repairing” to load blurry pictures into Repairit.
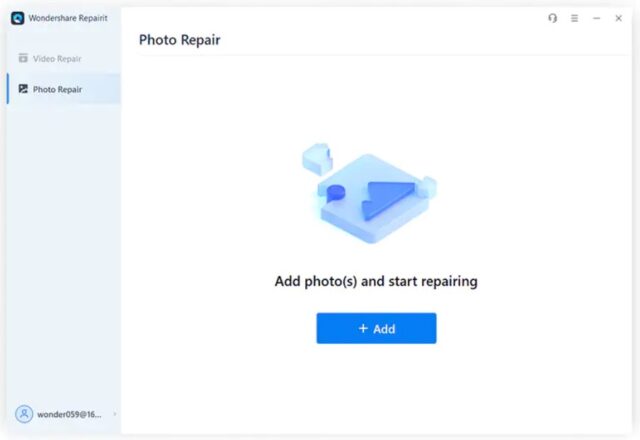
Want to fix multiple blurry photos? If yes, you can load them at the same time. Once they are loaded into Repairit, you will be able to see their basic information on the screen, like image resolution, size, etc.
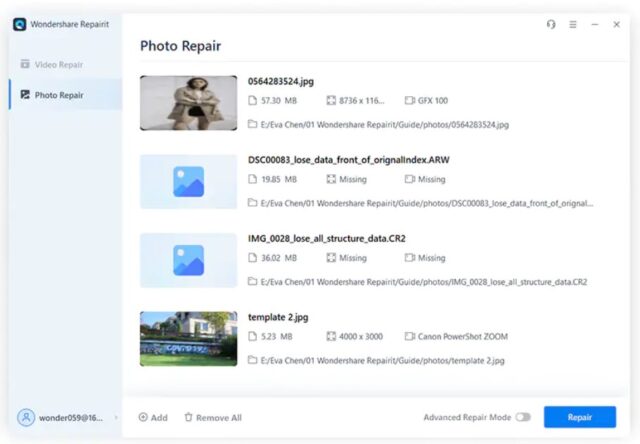
Step 3: It is time to repair all the loaded pictures by hitting the “Repair” button placed in the bottom right. Once the photo repair process is completed, a notification showing the success of this process will appear, as shown below.
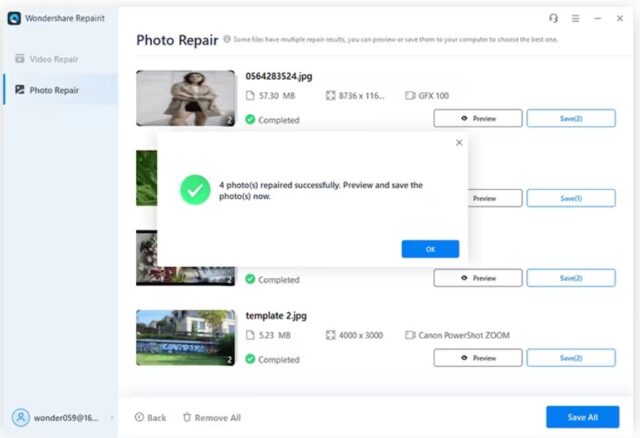
Step 4: Click on the “Preview” button to preview the picture repaired in the previous step.
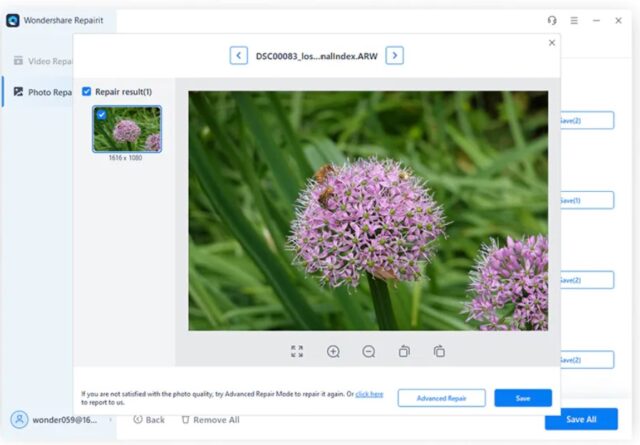
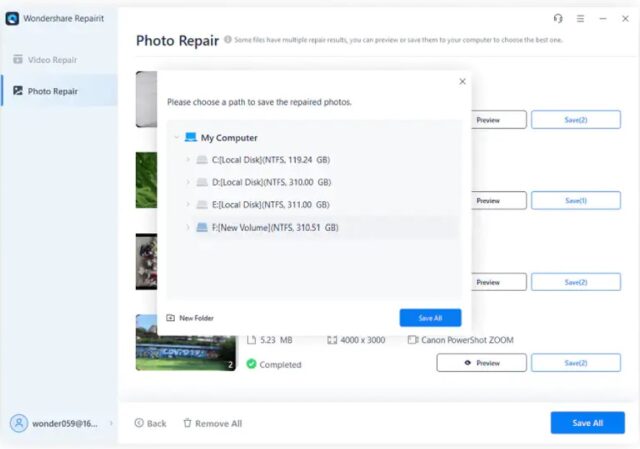
Step 5: If the previewed image is clear enough now and you are happy with it, click the “Save” button, select the path, and save the repaired picture on your device immediately.
Bonus Tip: How to Prevent Your Photos from Getting Blurred?
Now you have removed the blur from your photos. You will never want to see them unclear or blurry in the future. Right? Well, follow the tips given below to keep your photos away from blur issues.
- The very first thing you should consider is to invest in high-quality digital cameras.
- Make sure you use a tripod every time you capture photos of either static or moving objects.
- Taking multiple shots of the same scene is also a good idea to avoid blurry photo problems.
- Try using focus or blur correction programs to get rid of this issue.
- Don’t move while taking photos.
- Benefit from the internal lens and camera stabilization settings to capture sharper pictures.
- Try turning off the auto mode of your camera to get control over the shutter speed and take clear photos.
Final Words
Photography is an evergreen field. Looking at the diversification of this domain, millions of youngsters from across the globe dream of joining the photography industry. But one of the biggest problems photographers face is blurry photos captured in a hurry or some other issue. This is what becomes a serious concern for many people.
Don’t worry if the pictures you have just captured are blurry, as you can remove blur from photos using Wondershare Repairit – Photo Repair. Both the online app and desktop program of this software are available. You can choose the one you find most suitable. Making pictures clear with this photo repair tool is not only 100% safe but also efficient. For further specifications, read the guide above.


