Step by Step Procedure To Create a Facebook Page
Facebook Pages allow brands, businesses, public figures and organizations to remain in contact with their subscribers. Just like the normal profiles, one can customize the Pages with stories, events and much more. If someone likes your page, that person will be able to view your stories in their News Feed.
Facebook is a dynamic social media platform. From time to time new changes are made and so is the process of creating the Pages.
Do not waste time clicking link after another as you try to create a Page. Here is a quick guide to help you get done.
Step 1: Select the Appropriate Classification
Begin your Facebook Page adventure by navigating to . With this page, you will be provided with six interesting classifications for your page.
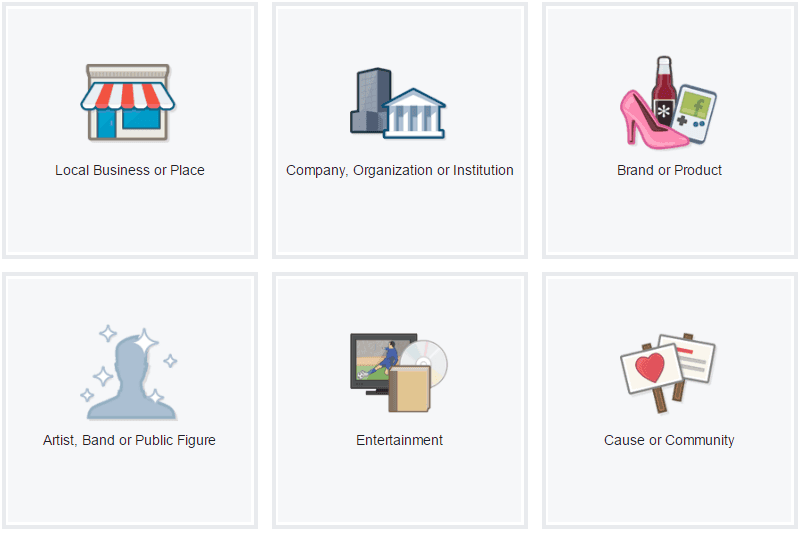
The available classifications to choose from are:
- Local Business or Place
- Company, Organization, or Institution
- Brand or Product
- Artist, Band, or Public Figure
- Entertainment
- Cause or Community
In order to ensure we take you through the tutorial, we will use the Company, Organization, or Institution. Once you have selected this option, you will be asked to input the Company Name and the category.
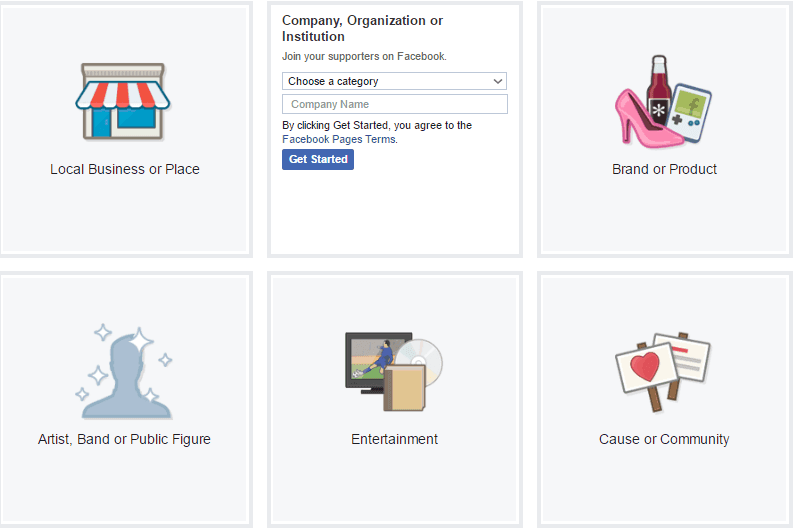
Be keen on the kind of name you choose here. Select a catchy name that best describes your business. Even though you can change this later on, the process is tedious and difficult.
Step 2: Redirected to the New Page
Once you have chosen the name and the industry, Facebook will redirect you to your new page. And that’s it! You already have a Facebook Page.
But everything doesn’t stop here. You have to make it an interesting Page for your users. Some of the customization offered to you include:
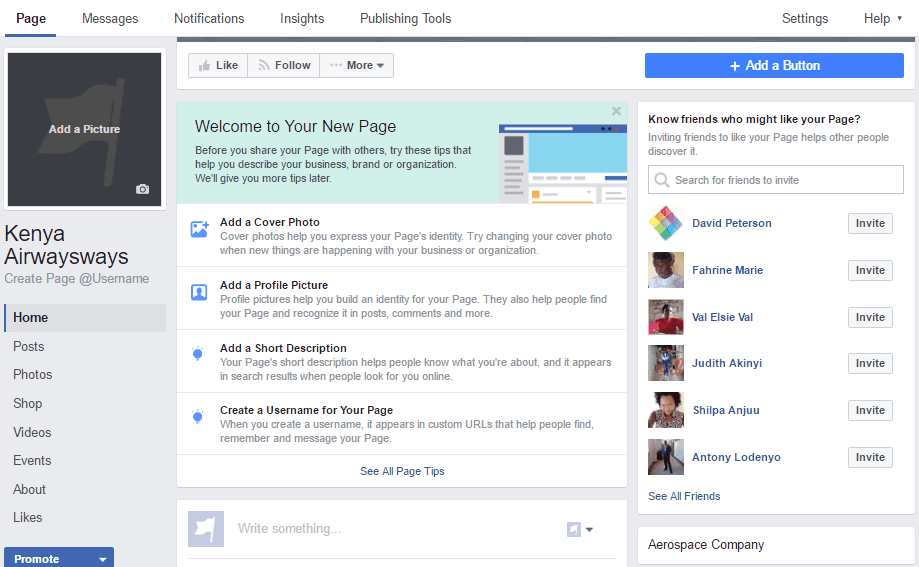
- Complete the “About” Section
- Add to Favorites
- Invite People to like
- Add a Cover Photo
- Add a Profile Picture
- Add a Short Description
- Create Username for Your Page
The “About” Section
This requires a 2 – 3 sentence description of what your company is all about. Make it as succinct as you can because the description will be displayed on your main page. Include a link to your website within this description.
In addition, ensure the information provided brings about a complete difference between you and any other page out there. That is what makes the Page appealing to your followers.
The Profile Picture
Your Page’s profile picture is basically the main visual icon associated with your brand/business. It will be the first thing noticeable in search results and any comments published from the Page.
Have at hand a catchy image that represents the brand. We recommend a square image with the dimensions 180 x 180 pixels.
Add to Favorites
This is a feature that is meant to ease the accessibility of your Page. Each Facebook user is provided with a navigation bar on the left of their News Feed. To ensure your Page appears here, add it as a “Favorite” item. This can be likened to Bookmarking a web page.
Invite People to Like Your Page
When you are set with the basic settings of your page, you have two ways of reaching more people. The first instance is to invite friends to like the page. The other way is to create an advert.
Even though you want to use paid tactics for a wider audience, my recommendation is to avoid it at least at the earlier stages. At this time, you do not have compelling content on your pages that can be used to convince people “Like” your page. First create attractive and appealing content and then consider the paid marketing later on.
Step 3: Get Used to Your Admin Panel
Your Business Page is now live, though in a skeleton-like appearance. You have the option of “Liking” the page but refrain from that at the moment. Doing so will mean the page’s publishing will be seen on the News Feed of the friends you are connected to. Save this organic Timeline until the time you will have sufficient content.
In the top Navigation bar, there is a link to the settings page. Click on it
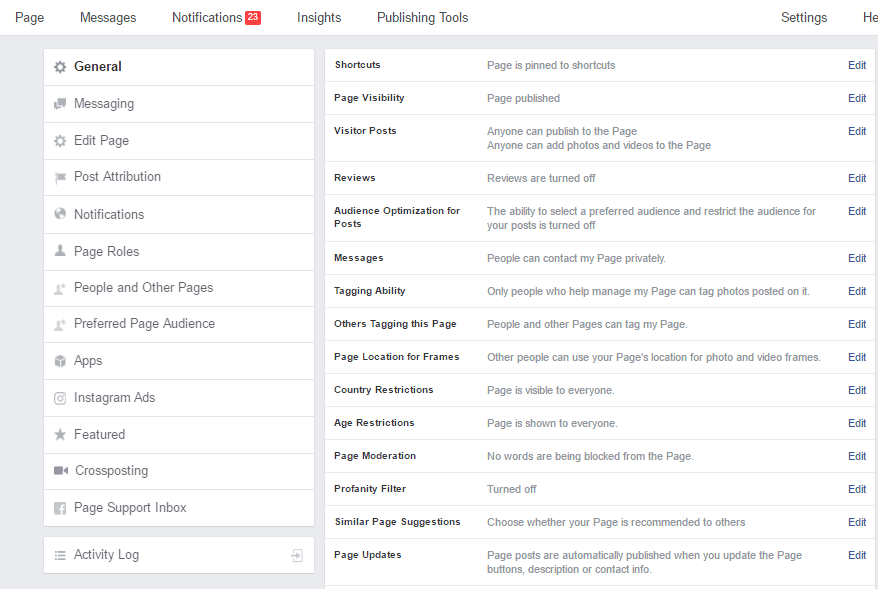
On the left side of the new page, you have “General Settings” options. Here you get a quick link to settings like Messaging, Edi Page, Post Attribution, and Page Roles.
The Middle section advises you on the visibility of your page – published or unpublished. It also gives you the ability to control visitor posts – whether anyone can publish on the page, add photos and videos.
There are numerous settings as you can see but we will turn our attentions on the main three at the moment:
- Notifications: At what time do you want to get the Page notifications? How should they be delivered to you? This settings feature lets you decide on that. It allows you to set a frequency that is convenient to your social media time.
- Page Info: Do you still have more information regarding your business that you want to put online? Do that here
- Page Roles: As much as you will be the Page’s main manager, you may need the assistance of some few other people. Invite colleagues to make changes on the page. For a typical Business page, the people you can add include:
- A support representative who can assist those asking technical questions.
- A page designer whose role is to upload new creatively designed photos
- A public relations manager who answers business questions asked by your subscribers
Step 4: Add Thousands of Content
You are now set to publish the first content on your page and invite people to your community. The basics of the content have to do with the cover photo and the posts.
Cover Photo

The appropriate size of a cover photo is 851 x 315 pixels. This image will span at the top of your facebook Page and is meant to attract more people to your site. There various online platforms to help you create attractive Facebook cover photos.
Posts
Now that you have set the necessary restrictions and have a profile picture and cover page in place, it’s time to get started with posting.
The posts will populate as time goes by. All you need is to maintain consistency.
There six types of posts you can make on the page i.e. Plain text status, Photo with caption, Link with caption, Video with caption, Event page and Location check-in.
It is important that you maintain a variety of posts to get your users’ attention.
You now have content on your Page, making it a perfect time to invite people to like your page.
Step 5: Keep track of Your Growth
You need to set aside time when you evaluate how your page is growing. Facebook offers you a number of tools to do so.
On the left of the top navigation bar, there is a link to the “Insights” Page. Here, you will have a number of options such as:
Page Overview: Get a 7-day snapshot of your metrics such as Page Likes, post reach, and overall engagement.
Likes: Get a detailed breakdown on how your advertised content is performing. How many paid likes did you get compared to the organic reach?
Visits: What is the main source of visitors to your Facebook Page? Is it from Facebook Timelines, your information tab, reviews, and others?
Reach: You get to see the number of audiences you’ve reached from raw posts. If a given day had more reach than any other, try replicating the same the following day at a similar time.
Main Image Source : Pixabay
Also See : 10 Things That You Should Do When Writing Your Will


